The SAAF Forum

Discussion on the SAAF and other southern African air forces.
It is currently 28 Dec 2025, 08:18

All times are UTC + 2 hours


Post new topic Reply to topic  [ 32 posts ]  Go to page Previous  1, 2, 3  Next
Author Message
PostPosted: 14 Jul 2025, 09:47 

Joined: 12 Apr 2011, 20:49
Posts: 1644
Location: Zwartkop
It's coming alive!

Lovely build!


Top
 Profile  
Reply with quote  
PostPosted: 18 Jul 2025, 14:41 
User avatar

Joined: 22 May 2018, 17:45
Posts: 142
Location: Czech Republic
Thanks :smt023

More progress made throughout the last days. Firstly I highlisted colors a bit using Abteilung 502 Light mud oil paint. Once dried I applied AK enemal Ochre filter to bring colors to live a bit and I believe one layer was enough. Tamiya and AK washes were also applied and once dry blurred with odorless thinner. Final AK RC Matt varnish (which is not too flat) was applied achieving suitable satin finish. Stowage like tarps were coated with Tamiya Flat varnish achieving "real flat" finish. Additional stowage in form of metal bucket and british great coat made out of Tamiya epoxy putty were added according to photos. Now I only need to finish respirator bag (gas mask bag) to the rear and field telephone wire drum to the front.

Image
Image
Image
Image
Image


Top
 Profile  
Reply with quote  
PostPosted: 22 Jul 2025, 21:59 
User avatar

Joined: 22 May 2018, 17:45
Posts: 142
Location: Czech Republic
I'm slowly working on weathering of lower parts of hull so I can proceed with track fitment. And that also means I had to prepare tracks itself. These were sprayed with mix of rubber black and brown, both from Tamiya XF range and sealed with AK RC Satin varnish to have some metal sheen. I wanted to achieve some light weathering as these doesn't seem to be very dirty from the photos. Dust/light mud accumulation were made with new acrylic AK Gouaches wiped away with wet brush. Details were picked up by polished graphite pen.
Image
Image

Good eye will also notice that end track pads are mounted other way around. That's made on purpose to provide me with clue of connection in case I'd need to remove them in further process. These would end up hidden and touching the ground.


Top
 Profile  
Reply with quote  
PostPosted: 31 Jul 2025, 13:03 
User avatar

Joined: 22 May 2018, 17:45
Posts: 142
Location: Czech Republic
With tracks and lower hull weathering ready, I proceeded further and attached tracks in its place. On first try, I figured out I am getting unrealistic sag so I removed one link on each run and get a proper fit of tracks. Fenders that were prepared for some time were then glued in its place by super glue. I couldn't resist and I had to attach all the stowage for photos.

It's finally taking a shape.

Image
Image
Image
Image

I started weathering with enemal products like rain marks, dust deposits and so on. I’m waiting for a good weather to take more pictures.

In the mean time, I worked further on 3D model of bulding. So far I plan to print first floor on regular 3D printer with details like windows, portal, house numbers and so on printed on resin printer.
I still need to model street lamp that was attached on corner of 2nd floor and some modifications for windows of 2nd, 3rd and 4th floor.

Image
Image
Image


Top
 Profile  
Reply with quote  
PostPosted: 07 Aug 2025, 21:43 
User avatar

Joined: 22 May 2018, 17:45
Posts: 142
Location: Czech Republic
Another WIP post here. I'm now jumping between different tasks like weathering, figures, diorama preps and other jobs.

Sherman received cable layer with spool on front glacis plate, crank handle still to be added. Weathering still requires some additional dust streaks, pigmets and dust accumulations. And general tweaking of overall look in the end. So far I finished figures of driver and radio operator, both dry fitted inside. Commanders hand are going to be adjusted to fit properly into the turret. Civilians are based and will be painted in coming weeks.

Image
Image
Image
Image
Image


Top
 Profile  
Reply with quote  
PostPosted: 27 Aug 2025, 13:15 
User avatar

Joined: 22 May 2018, 17:45
Posts: 142
Location: Czech Republic
Just a quick report.
I’ve spend some time painting civilians and also tweaking up a correct posture of commander in turret. Photos later.
I also worked further on 3D data for Bar Pieri, today Caffé Pieri. To do a proper research, I visited Florence for a week and took several photos of this building.

Quick comparison after 81 years.
Image
Image

I also had to visit Florence War Cemetery where lot of South Africans were put for their final resting. Situated next to Arno river with views of Appennines to the other side.
Image


Top
 Profile  
Reply with quote  
PostPosted: 27 Aug 2025, 16:25 
Site Admin
User avatar

Joined: 29 Jun 2004, 17:19
Posts: 8514
patrikf wrote:
Quick comparison after 81 years.

Now that is so cool!

_________________
How come every time my ship comes in, I'm at the airport?


Top
 Profile  
Reply with quote  
PostPosted: 29 Aug 2025, 17:38 

Joined: 12 Apr 2011, 20:49
Posts: 1644
Location: Zwartkop
This is going to be such an awesome diorama when complete! =D> =D>


Top
 Profile  
Reply with quote  
PostPosted: 16 Sep 2025, 22:42 
User avatar

Joined: 22 May 2018, 17:45
Posts: 142
Location: Czech Republic
Thank you so much for following this build along. Not so much was happening in last few days, but my brother reported today, that prints are slowly rolling out and added some sneak peeks. I can’t wait to get my hands on these on weekend :D
Image
Image


Top
 Profile  
Reply with quote  
PostPosted: 20 Sep 2025, 23:07 
User avatar

Joined: 22 May 2018, 17:45
Posts: 142
Location: Czech Republic
Picked up my 3D printed parts today. Green parts is regular filament prints and grey ones are out of resin printer. Here’s some photos of prints itself and a quick testing with Sherman. It looks amazing in my opinion.
Image

Image

Image

Image


Top
 Profile  
Reply with quote  
PostPosted: 27 Sep 2025, 01:52 
User avatar

Joined: 22 May 2018, 17:45
Posts: 142
Location: Czech Republic
Late night update. In last few days, I glued together 3D prints of first floor, smoothed layers a bit and apllied some textures to it. Now covered in control primer spray. This evening, I created a frame from plastic sheet with slight slope of the street with space below it for some balast to prevent tipping over with the overall height of 35 cm. Basic shape of upper floor was worked out from styrofoam board and is going to receive a layer of texture/plaster of higher thickness.
Quick pics on artificial light.

Image
Image
Image
Image


Top
 Profile  
Reply with quote  
PostPosted: 27 Sep 2025, 08:49 
Site Admin
User avatar

Joined: 29 Jun 2004, 17:19
Posts: 8514
Yowzer!

That is going to look incredible. \:D/

_________________
How come every time my ship comes in, I'm at the airport?


Top
 Profile  
Reply with quote  
PostPosted: 19 Oct 2025, 22:04 
User avatar

Joined: 22 May 2018, 17:45
Posts: 142
Location: Czech Republic
Thank you Dean, I hope I wouldn’t lost a breath on this one :D

F*ck up fairy worked in the mean time. PLA filament is not a friend of Tamiya putty together with sun drying behind window. Ask me how I know :lol: 
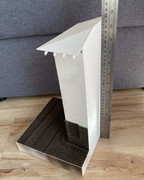
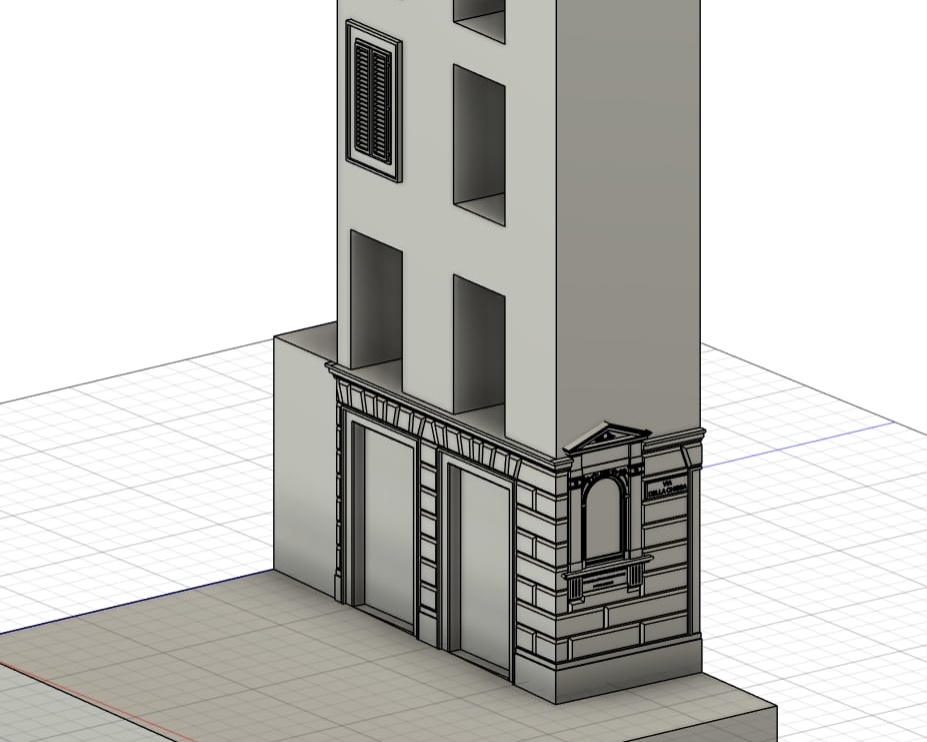
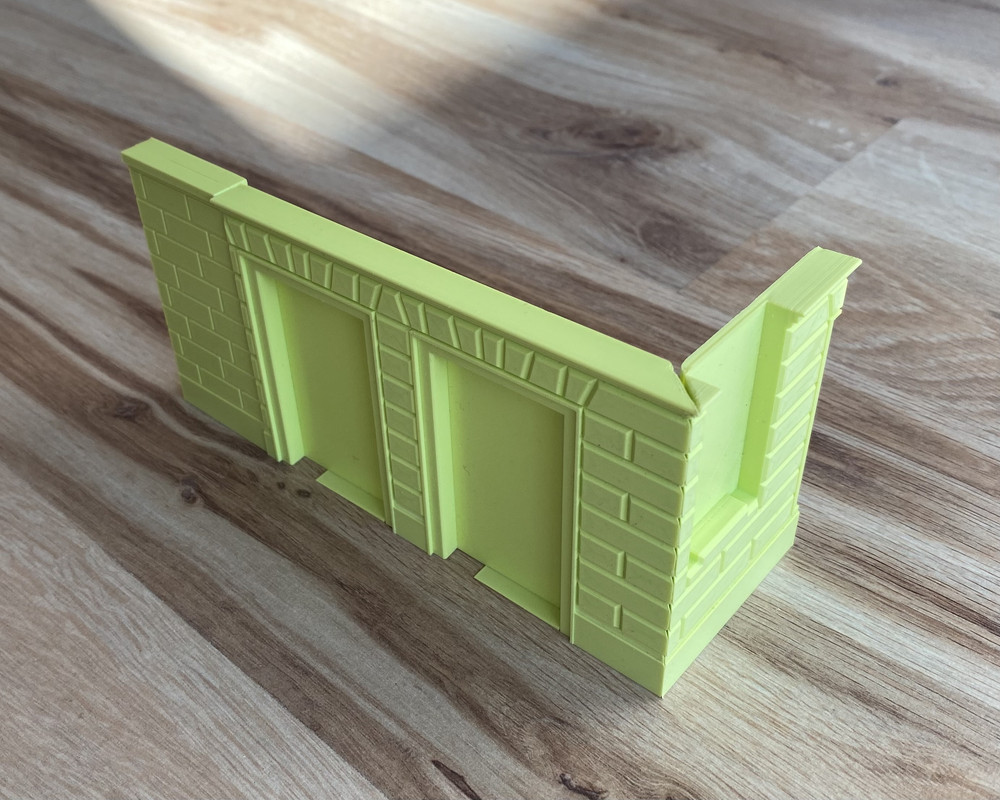
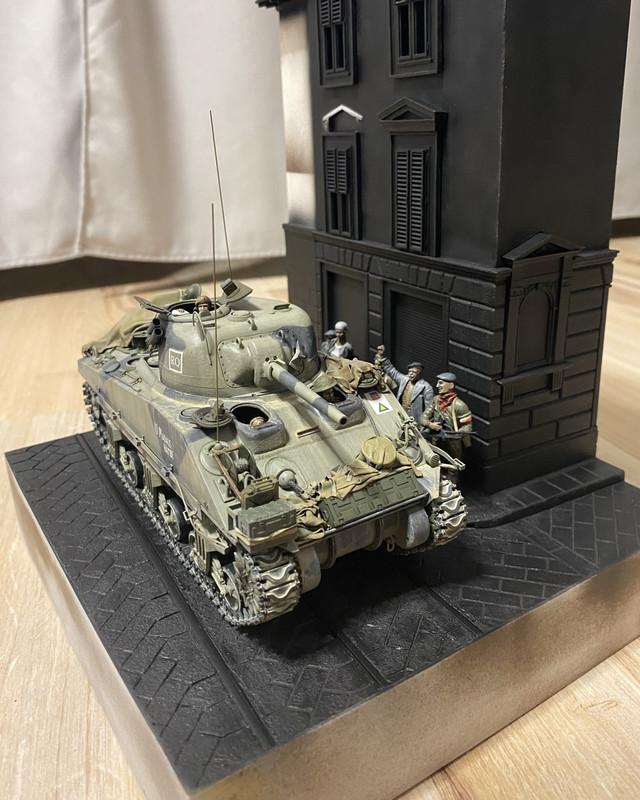
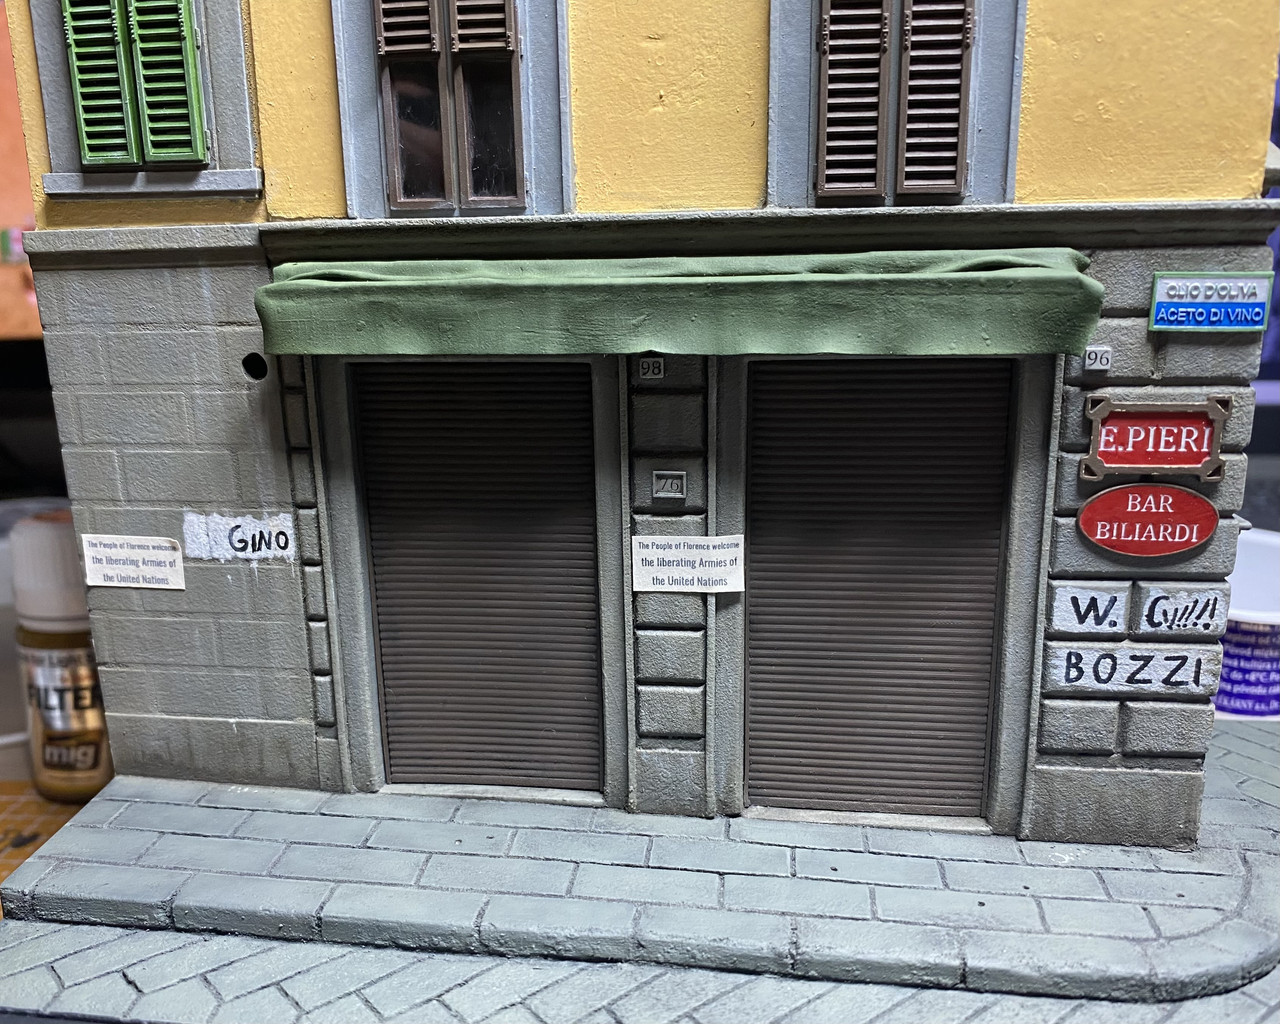
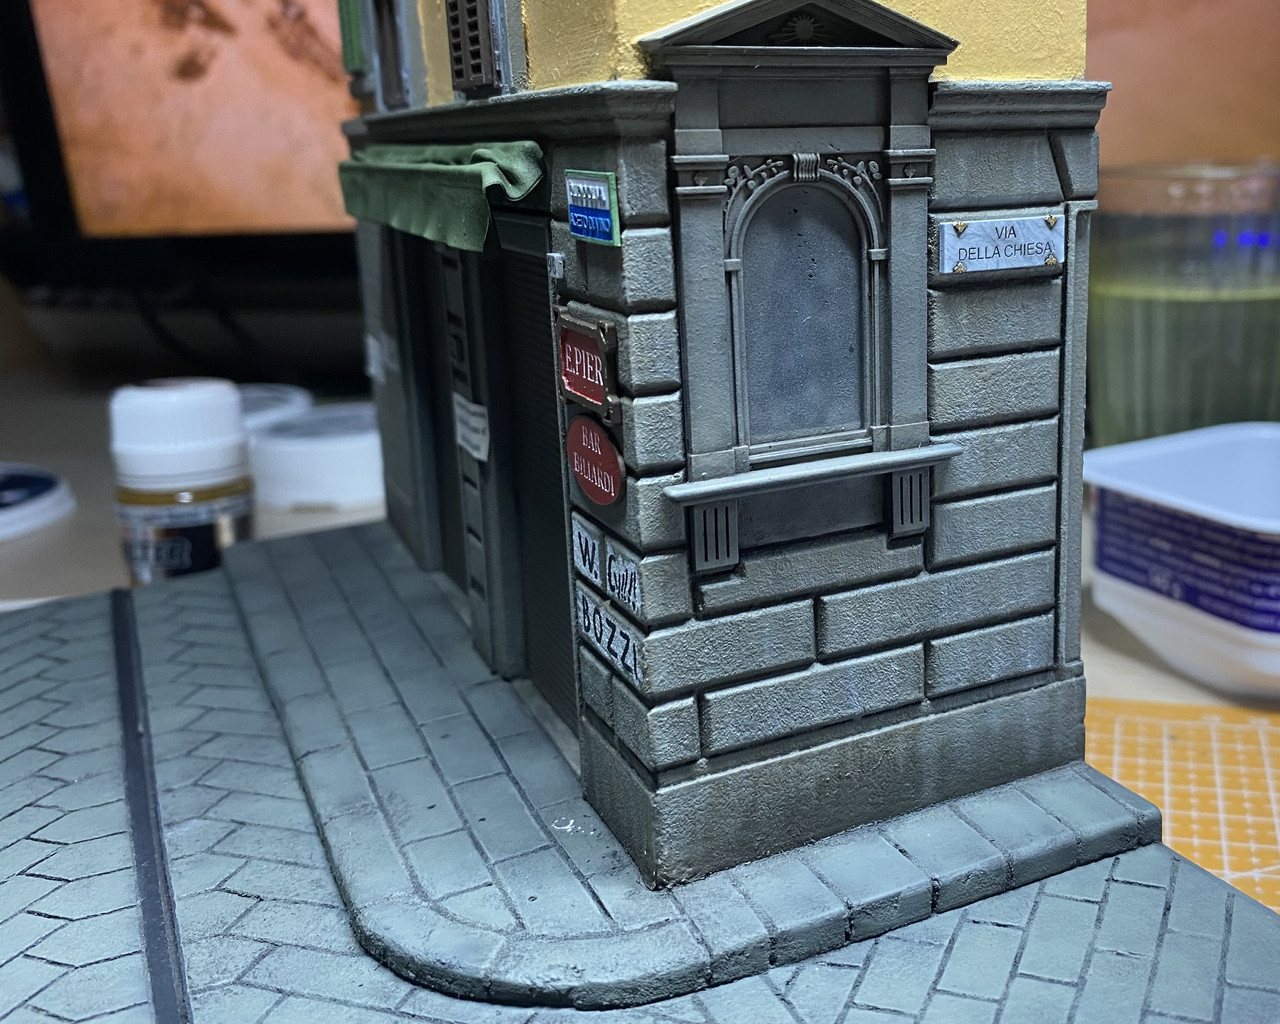
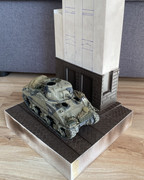
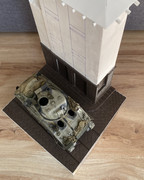
whole first floor ended up shrunken and warped so it has to go and another one from PETG was printed. Fasade and street were made out of dry wall putty and pavement carefully measured out and pressed in with piece of metal. Tram tracks were made out of I plastic profile.

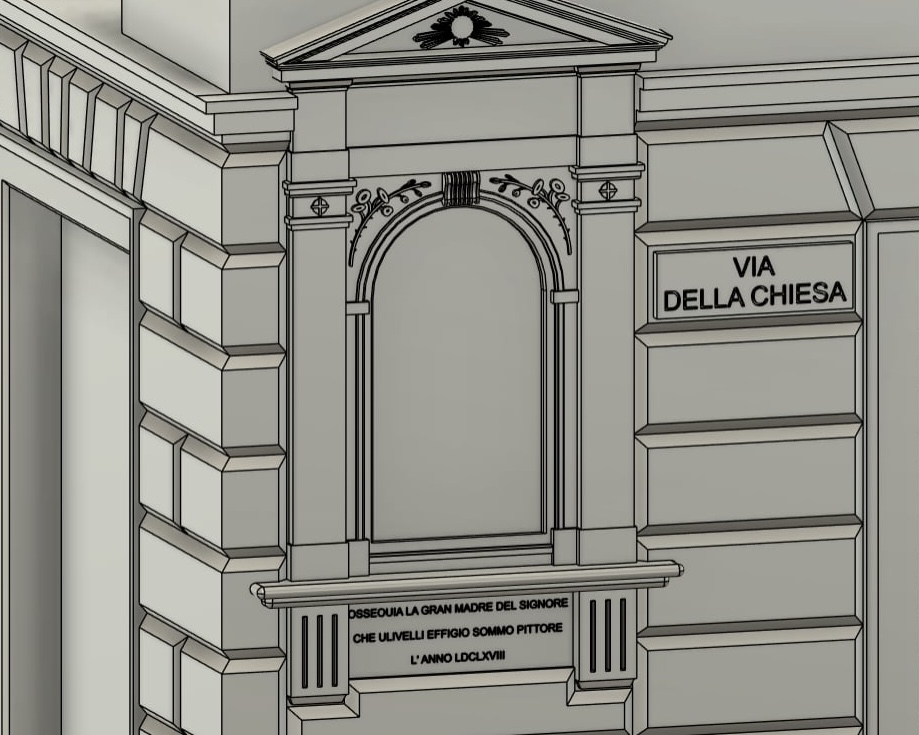
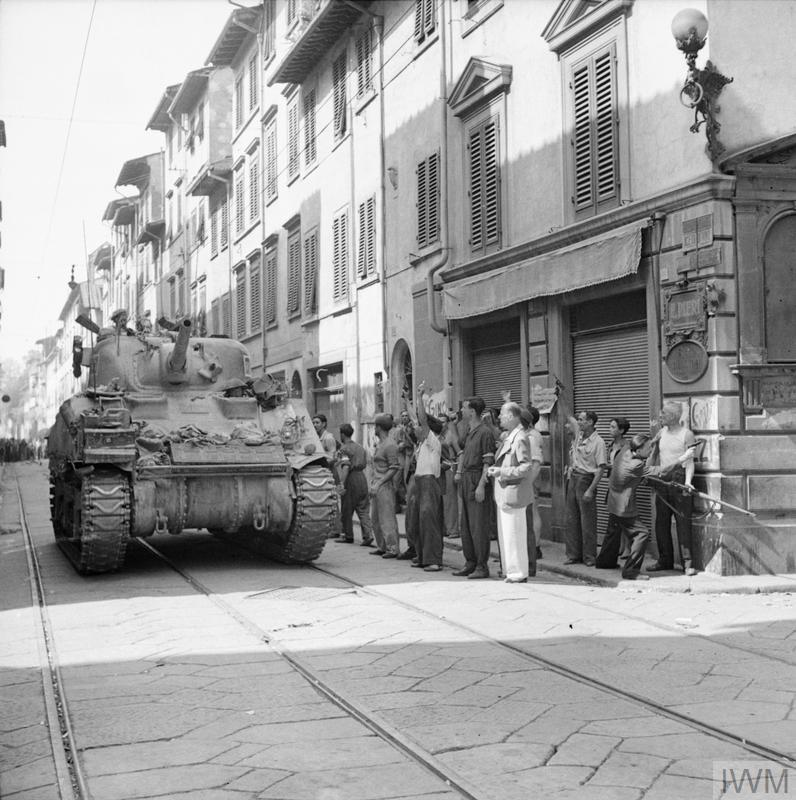
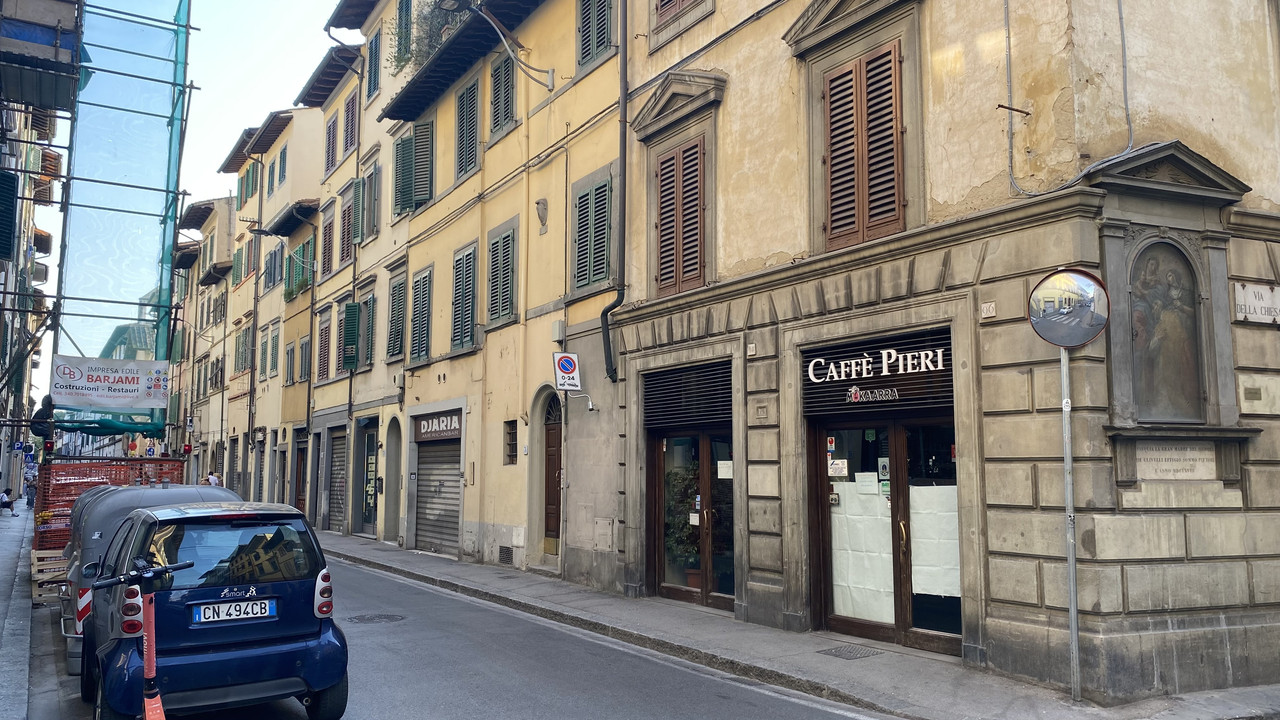
Weekend progress. I worked further on the base. Google maps provided info on correct shape of roof so I worked on this area. Ornamental cornice from 3D print was glued, basic roof shape out of plastic card and main beams out of plastic profile with wood grain made by razor saw. Beams were cut to size after the photo and also empty space on the left side of building filled in. I also prepared a roof on lower building but haven’t taken a photo yet.
Roof is going to be covered by 3D printed Italian tiles.
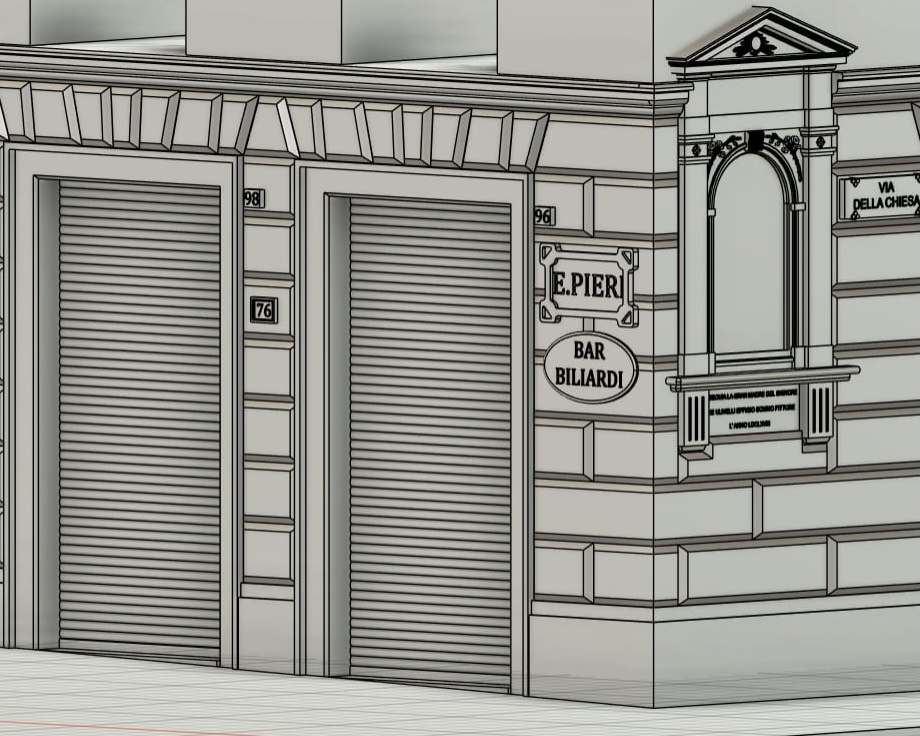
you can also see a marked out positions for windows on Caffe.
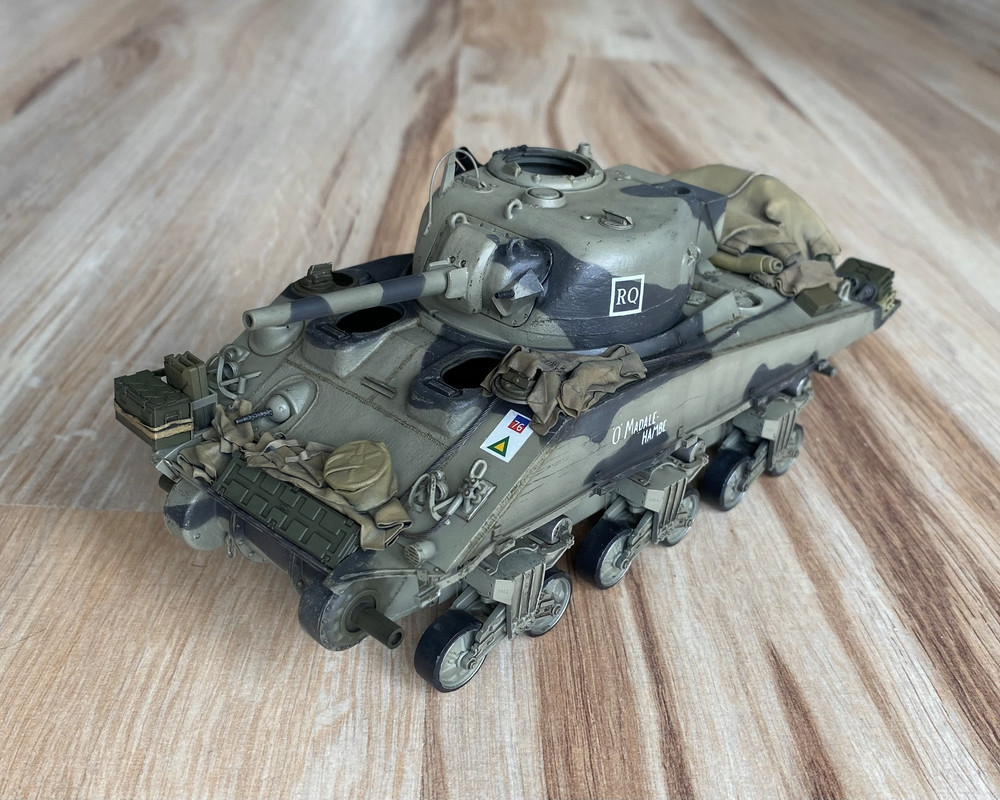
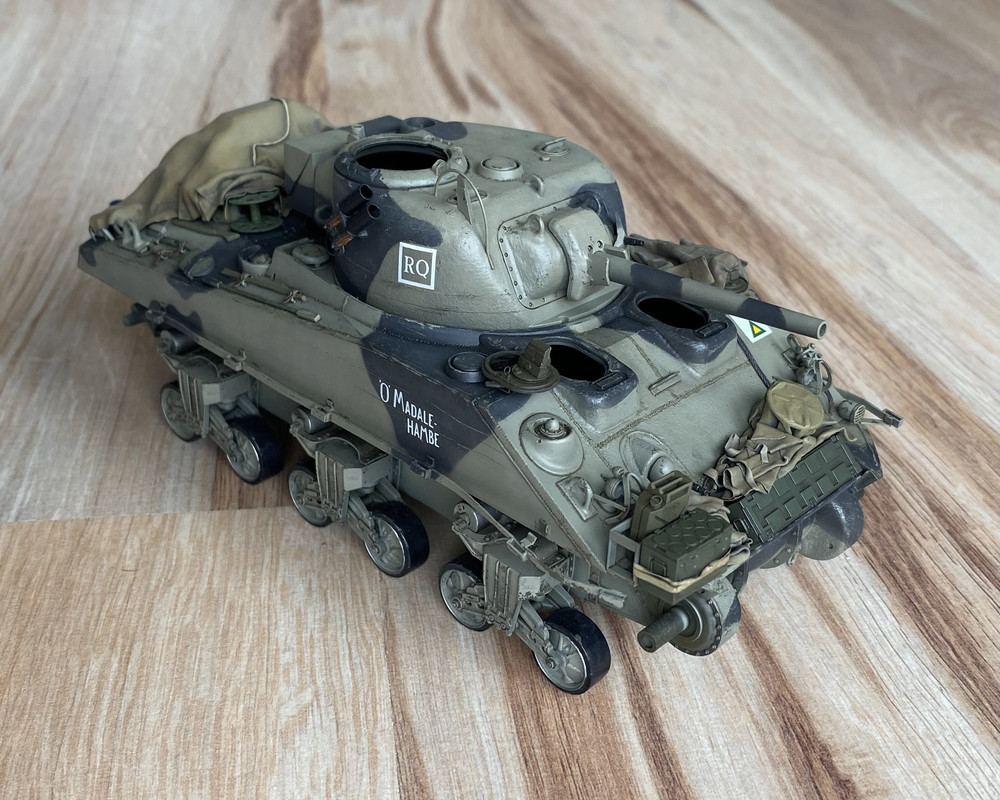
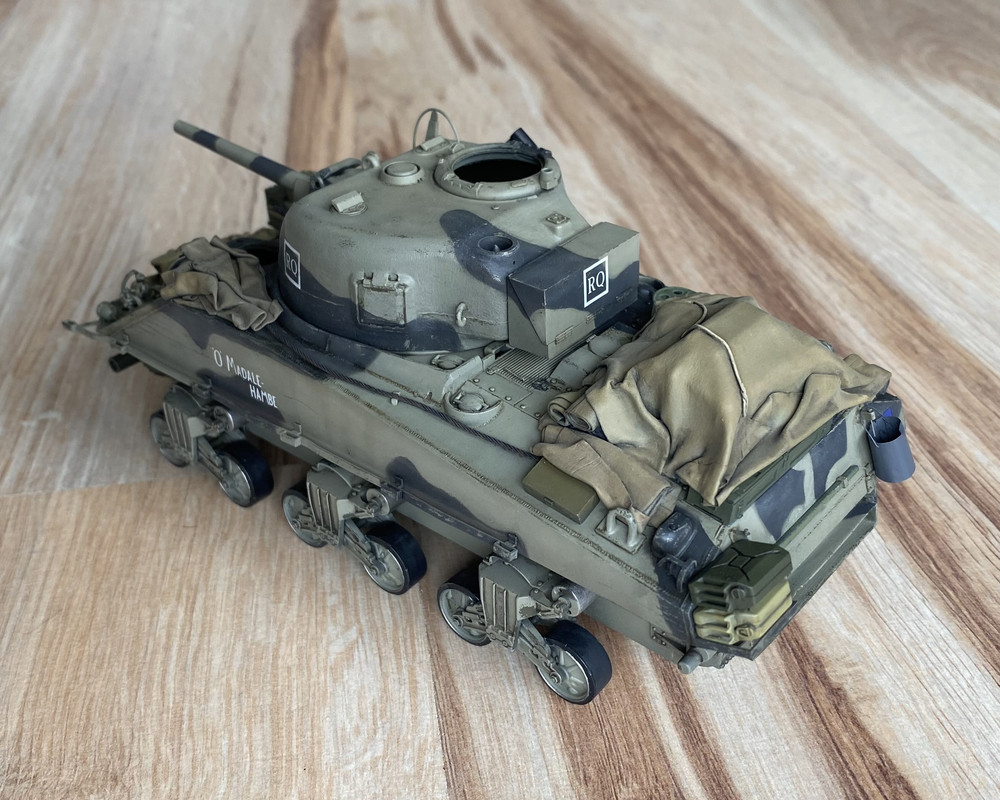
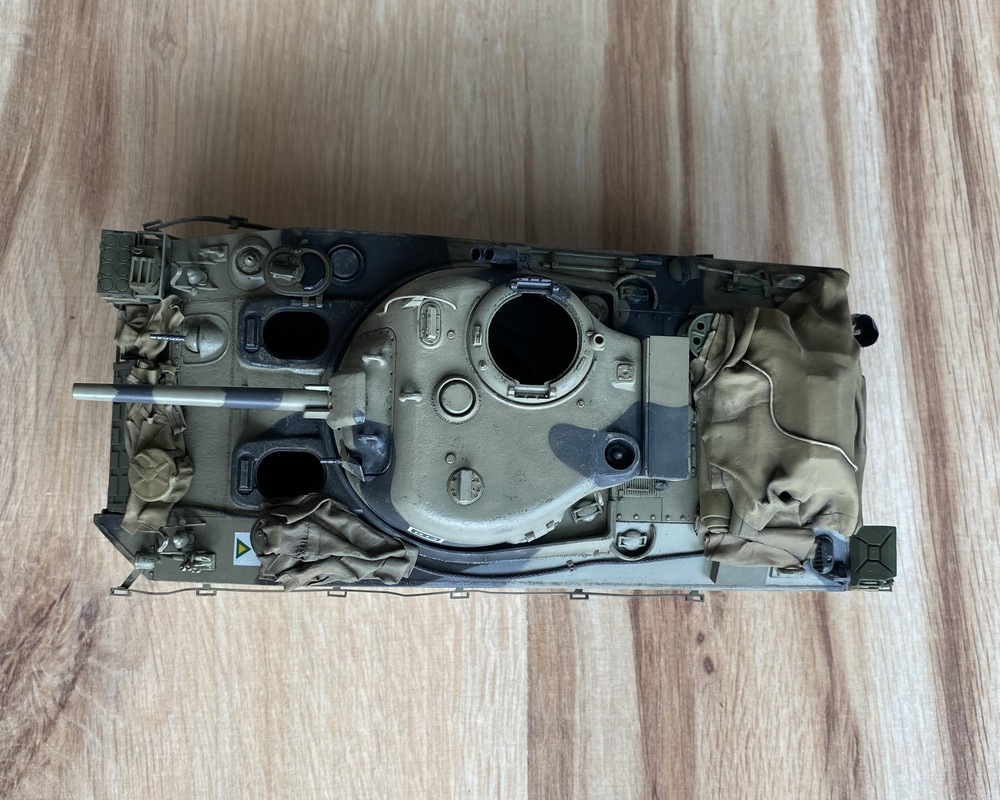
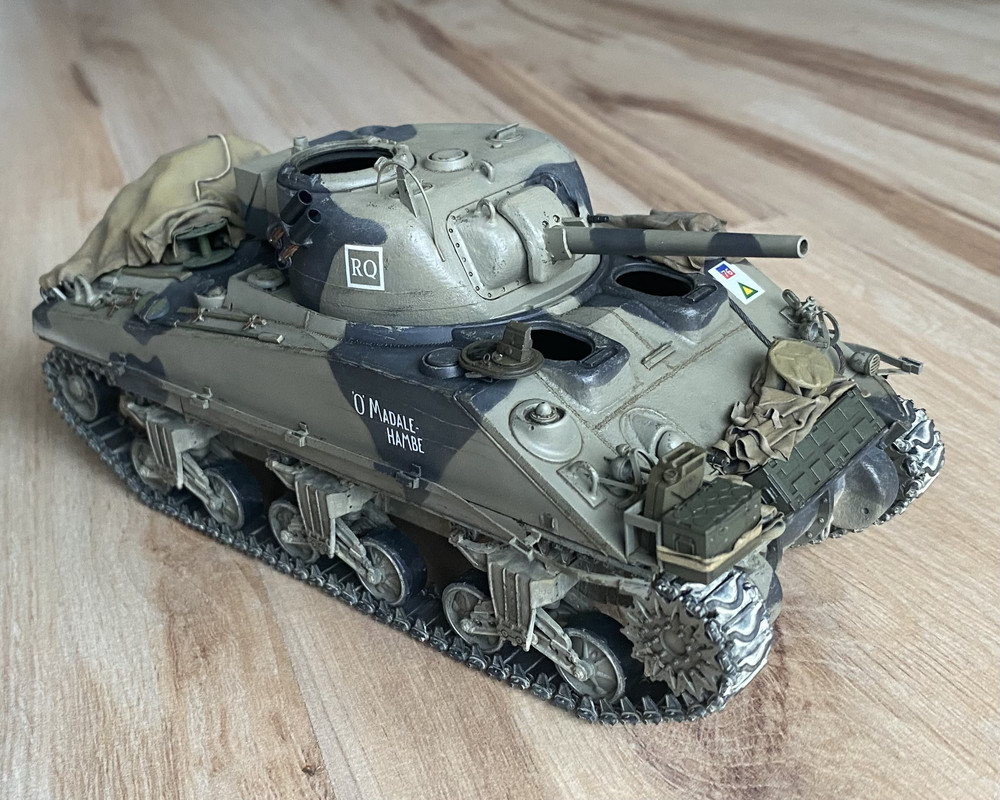
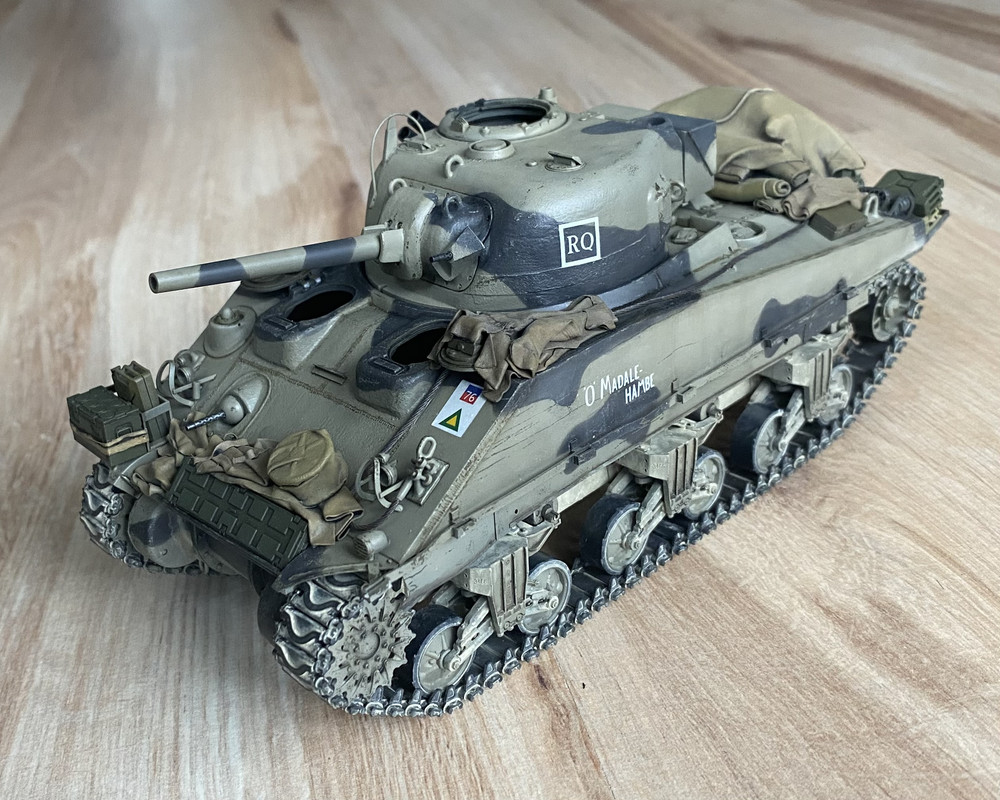
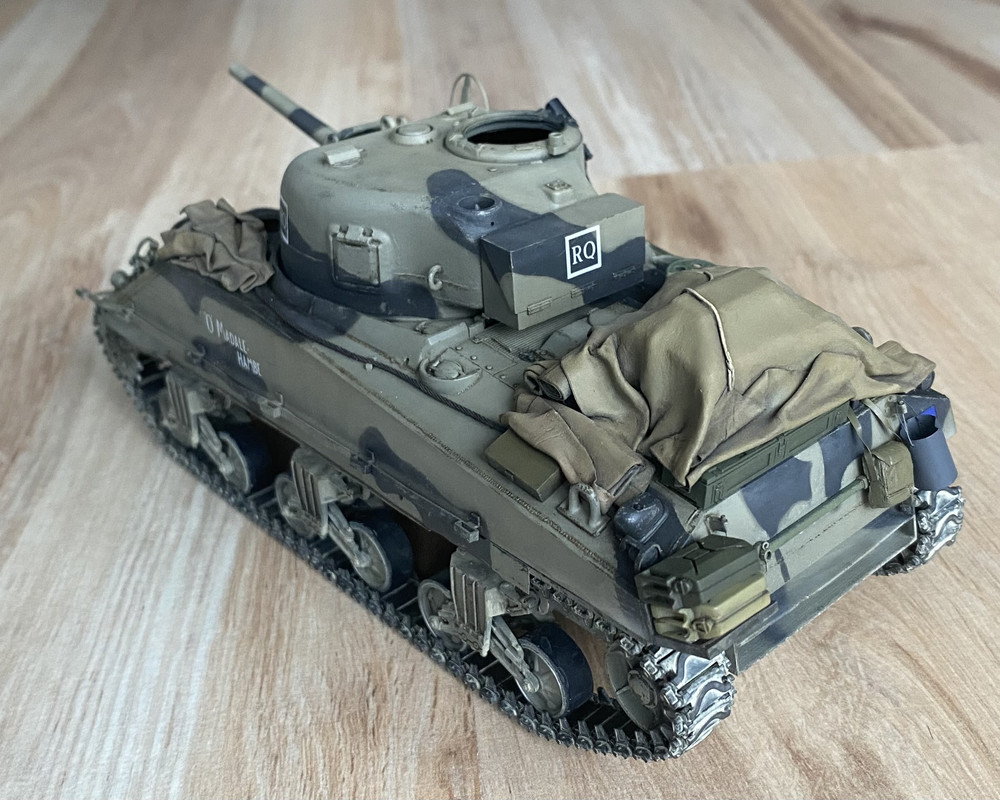
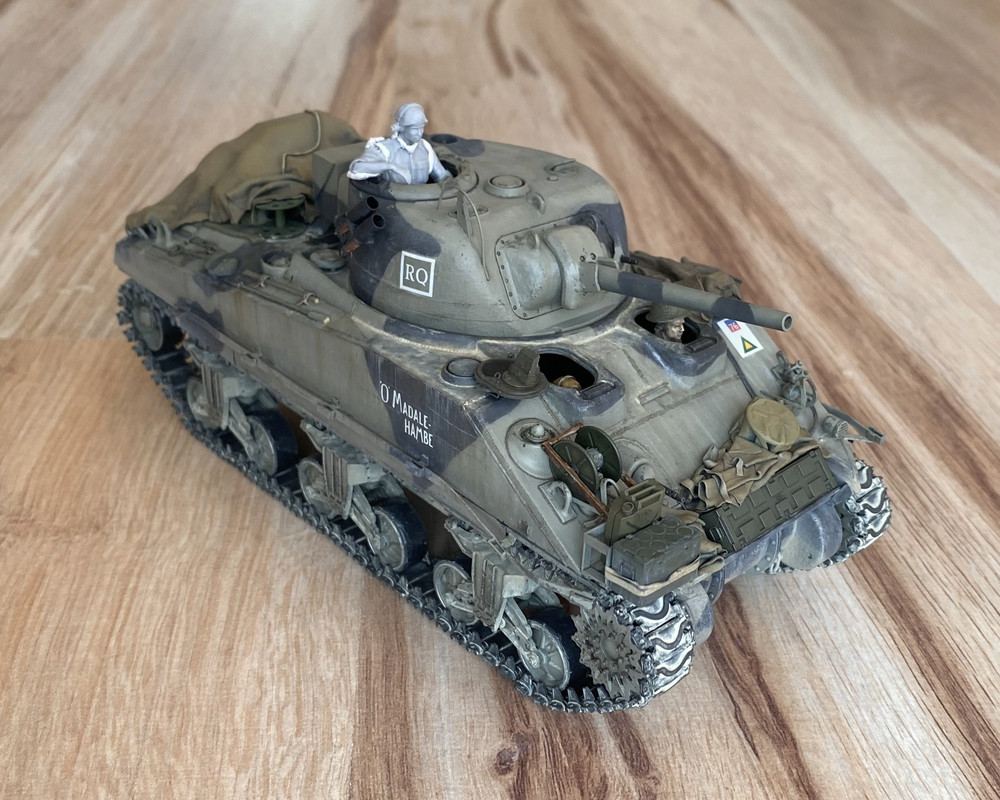
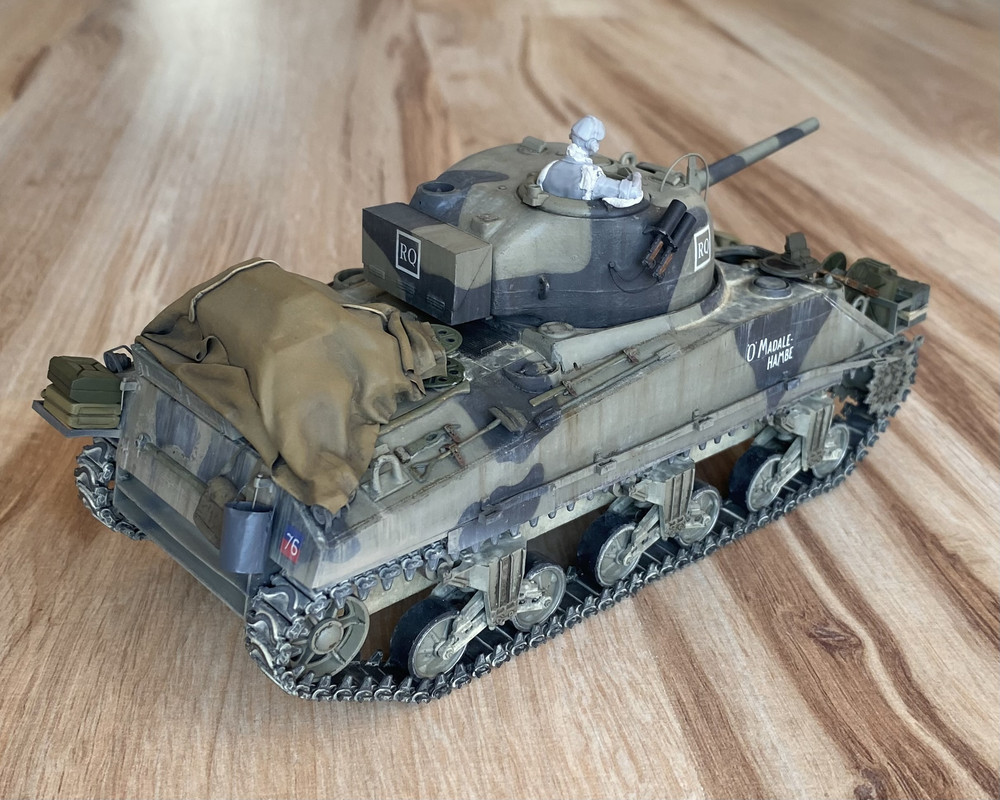
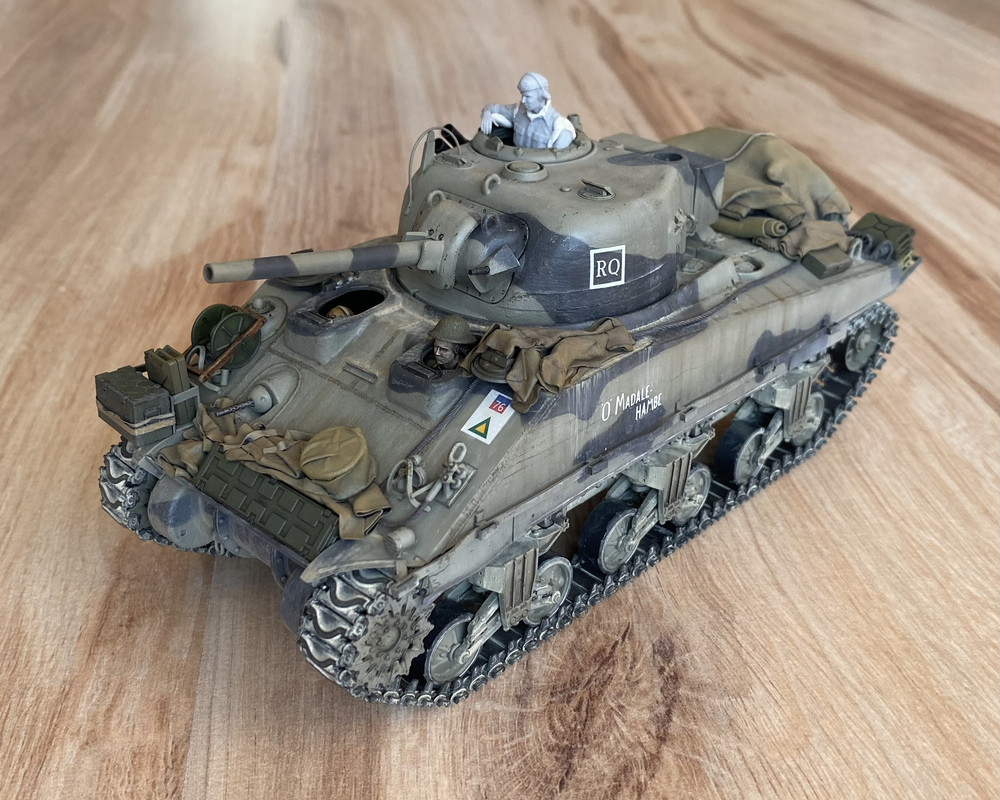
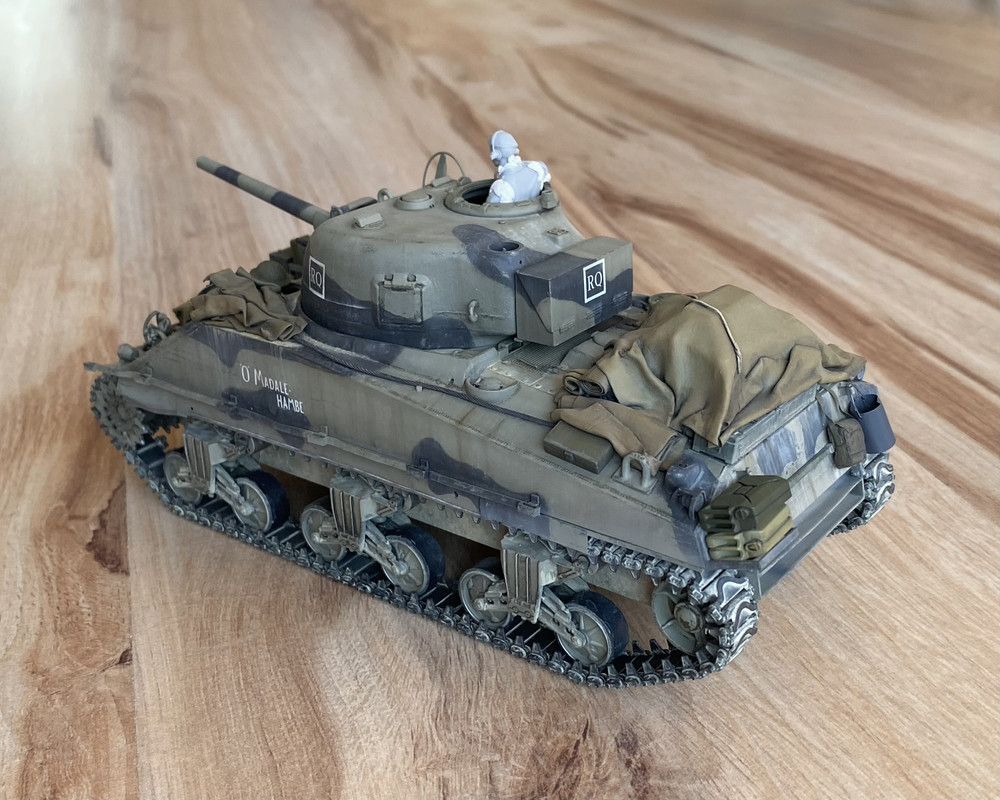
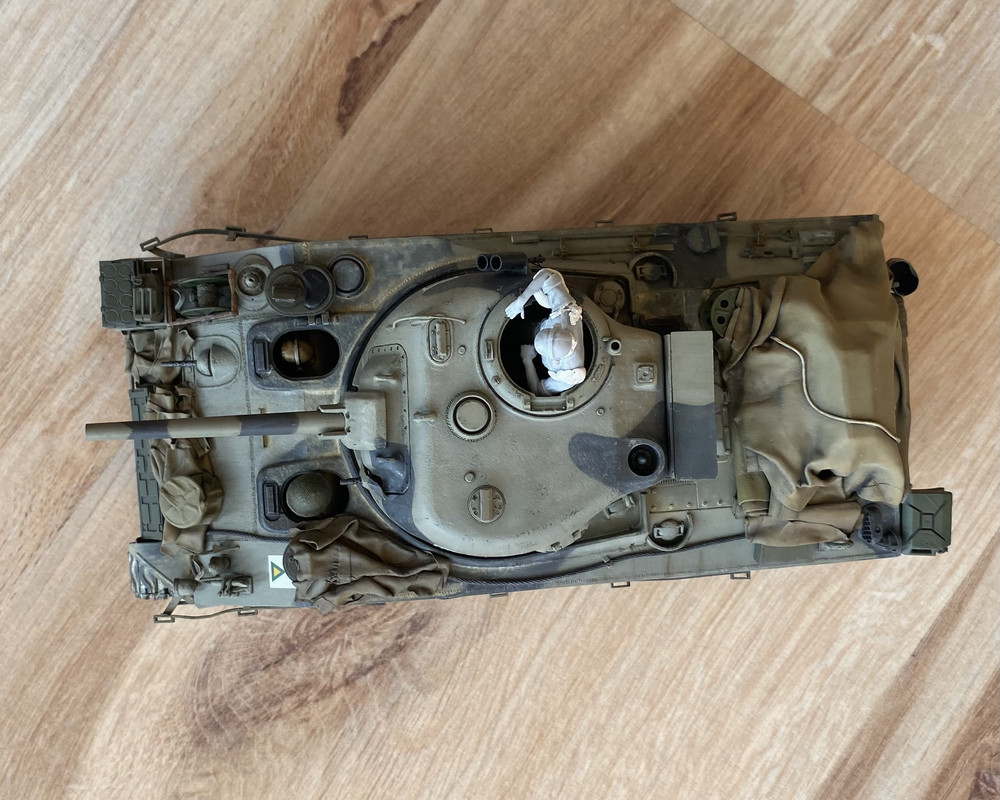
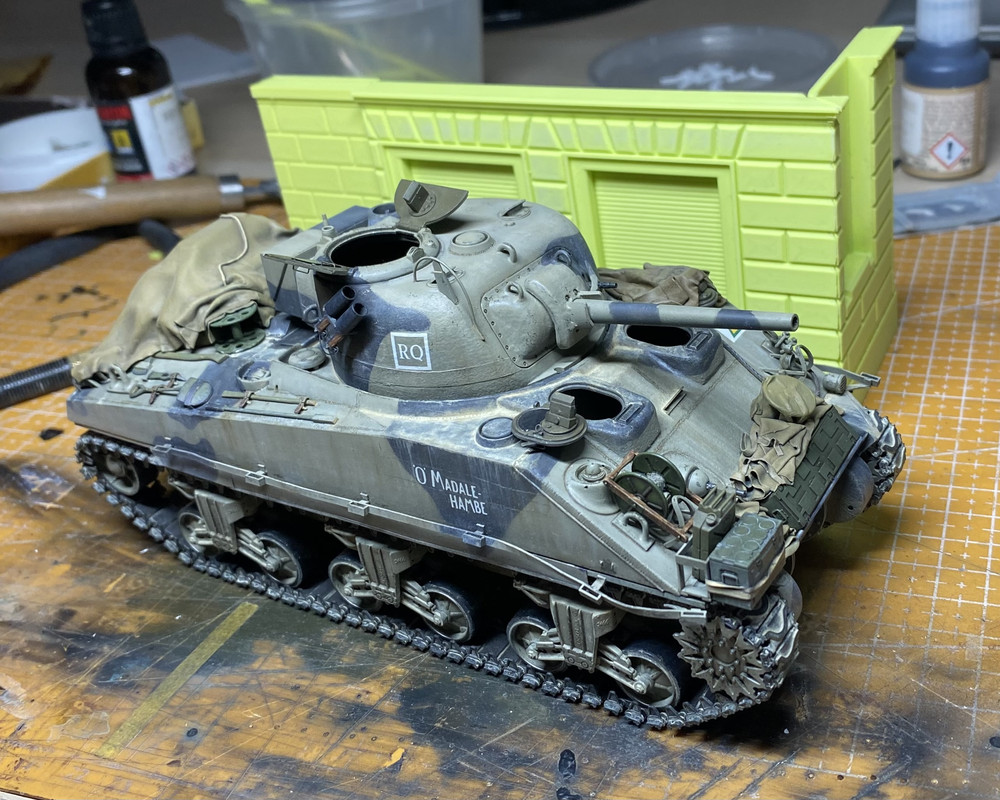
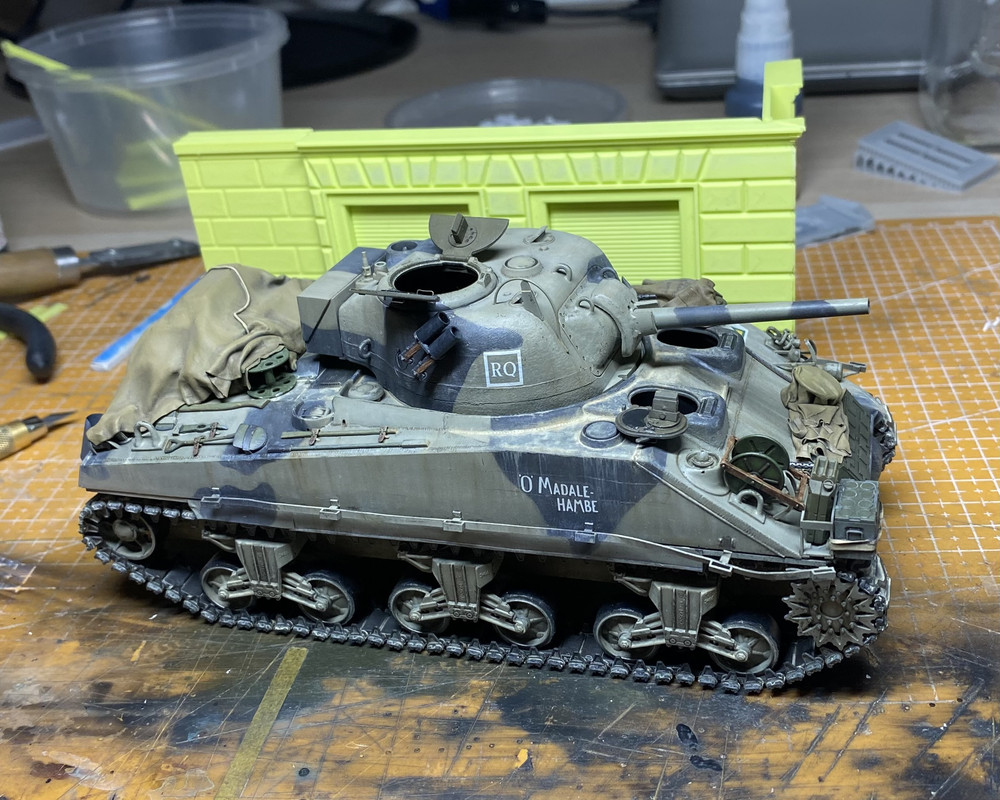
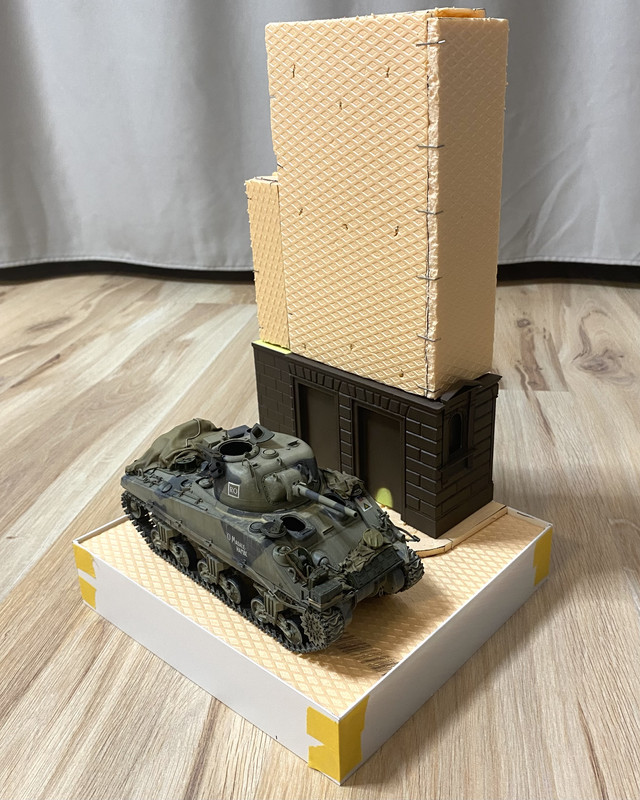
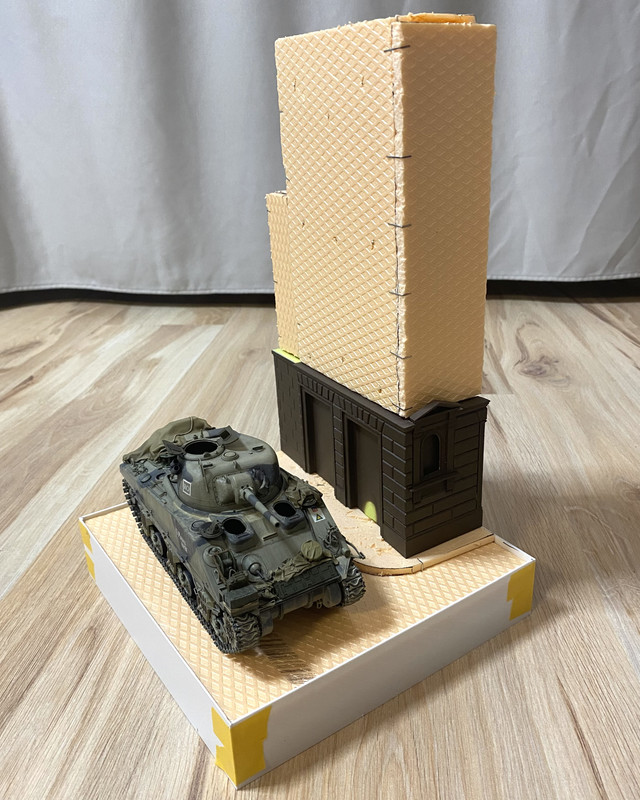
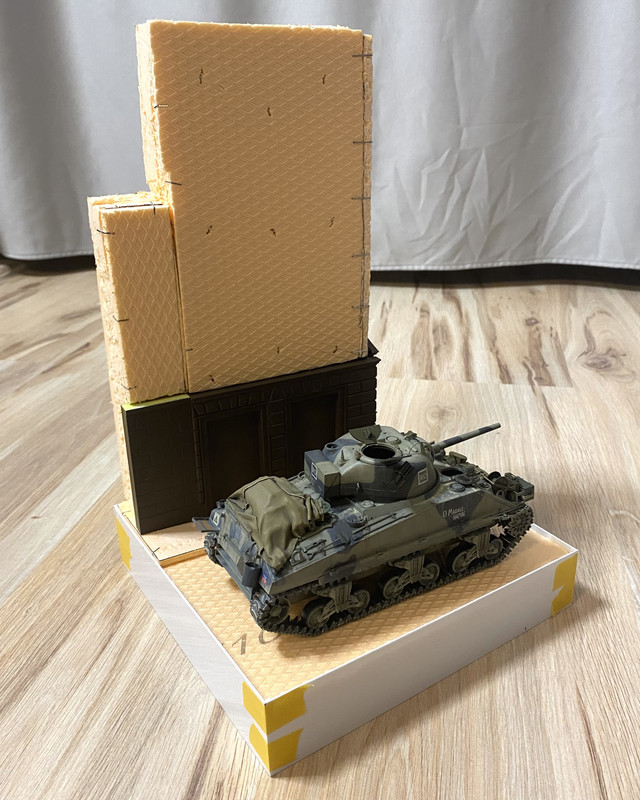
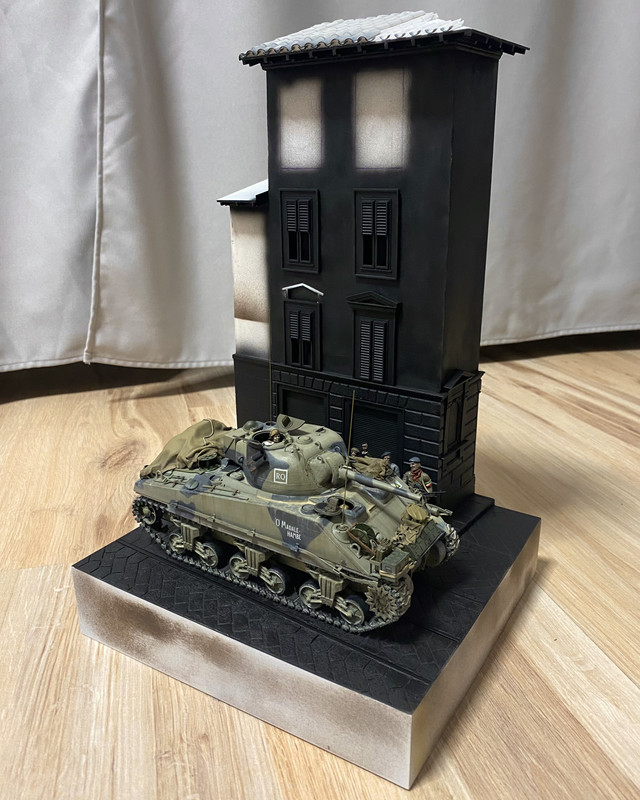
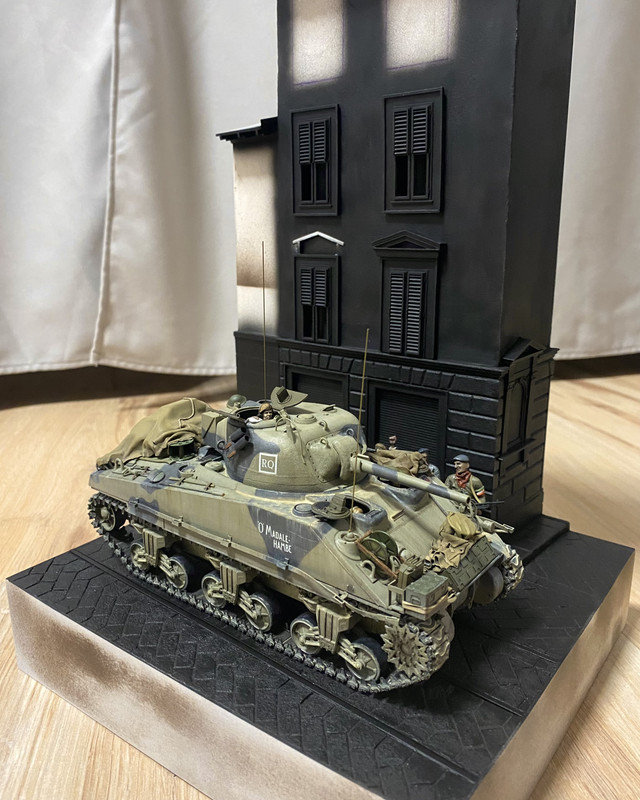
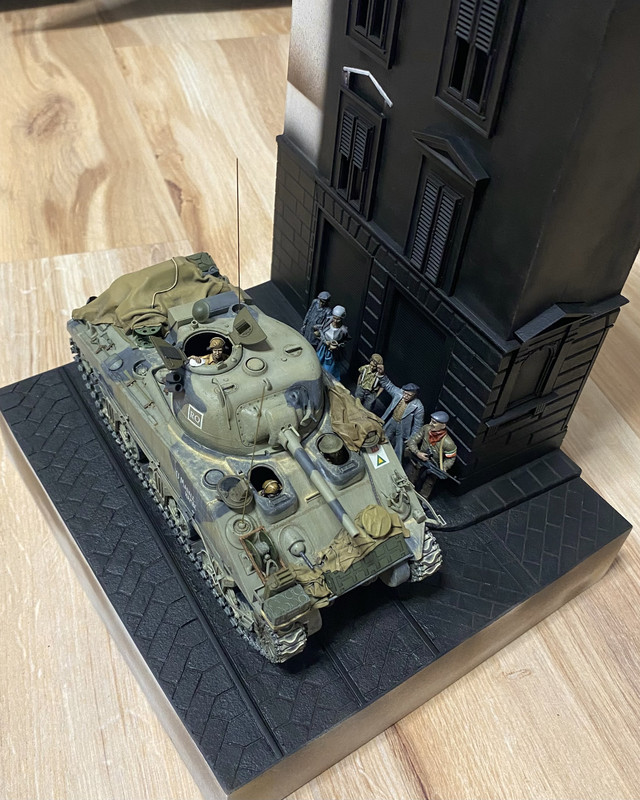
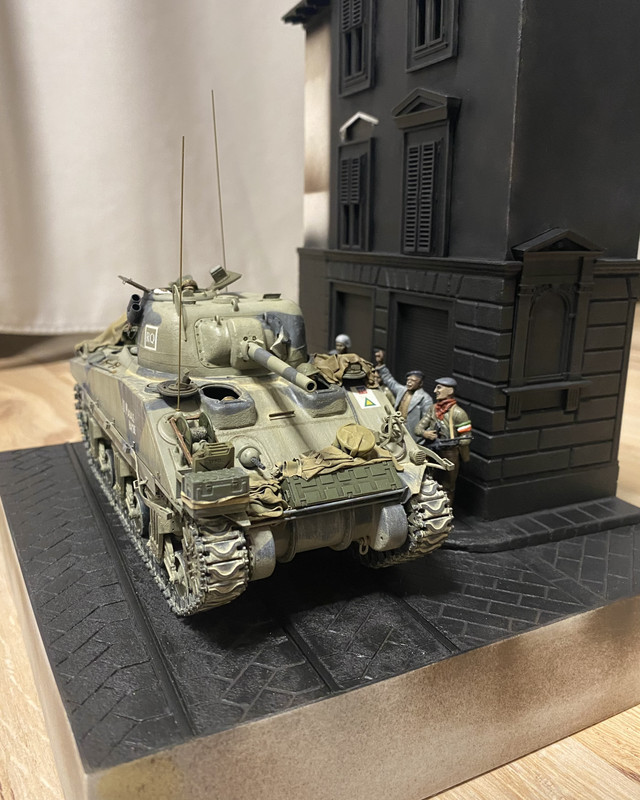
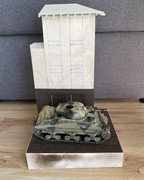
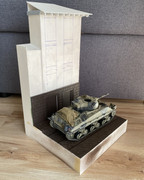
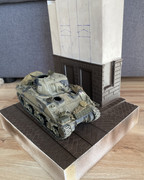
I pulled Sherman out of the box to get better idea how it’s gonna look.
Image
Image
Image
Image
Image

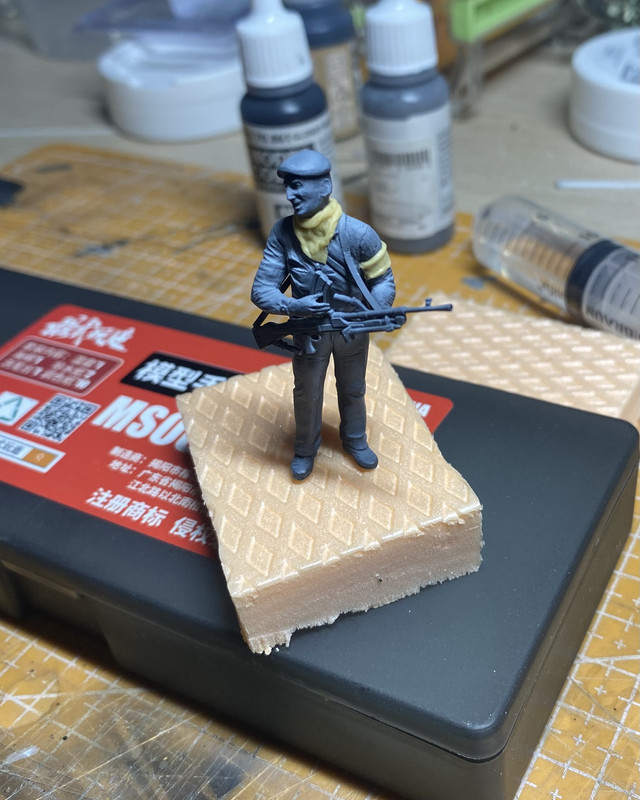
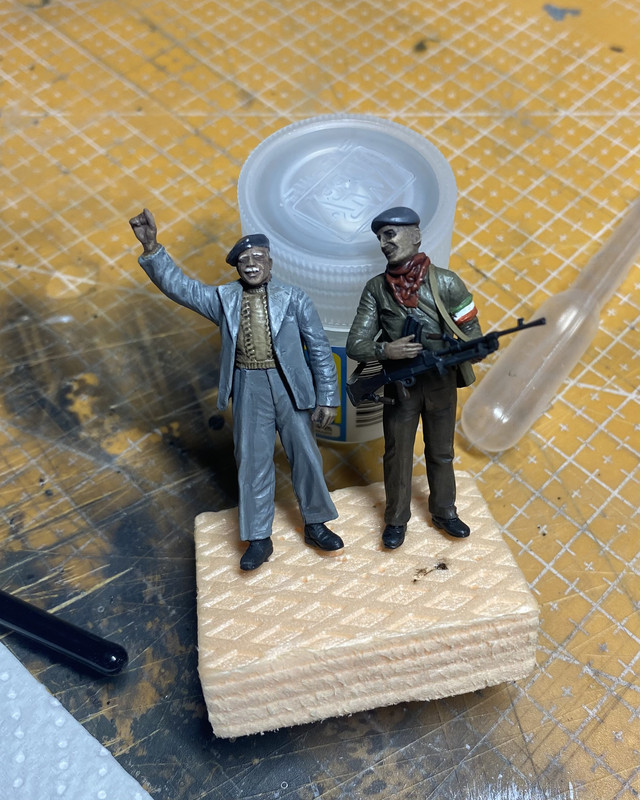
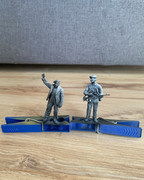
Two additional figures were finished building and received a base coat before I jump on them with acrylics.
Image

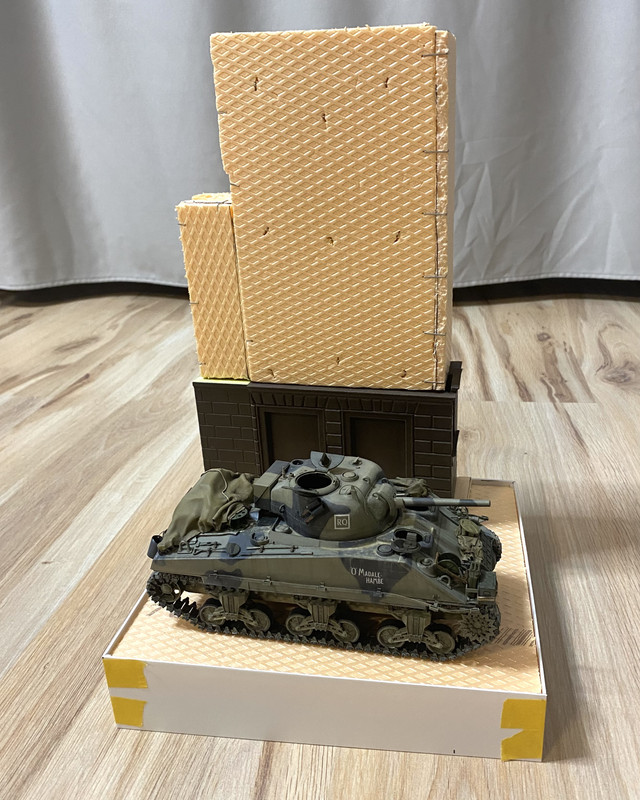
To give anyone an idea how tall this diorama is, here you are.
Image


Top
 Profile  
Reply with quote  
PostPosted: 24 Nov 2025, 11:19 
User avatar

Joined: 22 May 2018, 17:45
Posts: 142
Location: Czech Republic
A bit of a work throughout the last week or so.
I didn’t want to modify partisan figure at start but decided otherwise in the end. I quickly made scarf and armband from Tamiya putty and proceeded with painting of him and civilian.

Image

Partisan with typical red scarf and Italian tricolor armband. Both still waiting for additional shades and flat coat.
Image

With all of the figures almost finished, I couldn’t resist and I put the scene together. It seems that almost all of the missing prints are going to be ready on Tuesday so I’ll be able to proceed further. Note that some parts on tank and building are dryfitted.
Image
Image
Image
Image
Image


Top
 Profile  
Reply with quote  
PostPosted: 22 Dec 2025, 17:39 
User avatar

Joined: 22 May 2018, 17:45
Posts: 142
Location: Czech Republic
I thought I have only a minor progress, but looking at photos from my previous post, I see that I made a decent job pushing this diorama further.
First two photos were taken at work bench, others to see how the scene is going to looks like. I finally started my Christmas holidays on Friday so there’s time to paint and paint and repaint if necessary. These photos clearly shows that I will have to apply some lighter shades to civilian figures faces as these are too dark. 1st floor is almost finished, so is the roof and now I really need to work on 2nd to 4th floor.

Image
Image


Top
 Profile  
Reply with quote  
Display posts from previous:  Sort by  
Post new topic Reply to topic  [ 32 posts ]  Go to page Previous  1, 2, 3  Next

All times are UTC + 2 hours


You cannot post new topics in this forum
You cannot reply to topics in this forum
You cannot edit your posts in this forum
You cannot delete your posts in this forum

Search for:
Jump to:  
cron
Powered by phpBB® Forum Software © phpBB Group